

First, we will see what OWASP ZAP is.
OWASP ZAP is a fully featured open-source Dynamic Application Security Testing (DAST) tool capable of supporting manual web application penetration testing and automated vulnerability scanning with authentication session management.
Steps to Run DAST using OWASP ZAP with login authentication
Step 1: use manual explorer in ZAP to capture login steps.
Step 2: Create a new context of the root domain
Step 3: Configure Authentication
Step 4: Add the user
Step 5: Configure Session management
Step 6: Spider the Website
Step 7: Run Active Scan
Step 8: Generate Report
Step 1: use manual explorer in ZAP to capture login steps.
Manual explorer is a ZAP feature that launches a browser that allows us to explore the web application while HTTP traffic is proxy through ZAP.
In ZAP Dashboard, click on the large Manual Explore button.
Enter the URL of the web application for that you want to capture the login steps.
Then click the Launch Browser button to launch the browser with the URL.

Once the browse is launched, perform the login steps. For example, I am using OWASP Juice Shop.
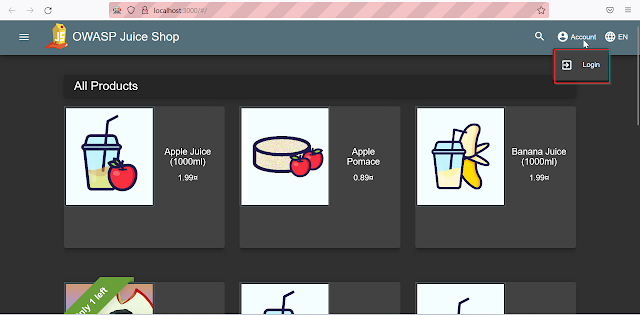
Click on the login button to open the login page.
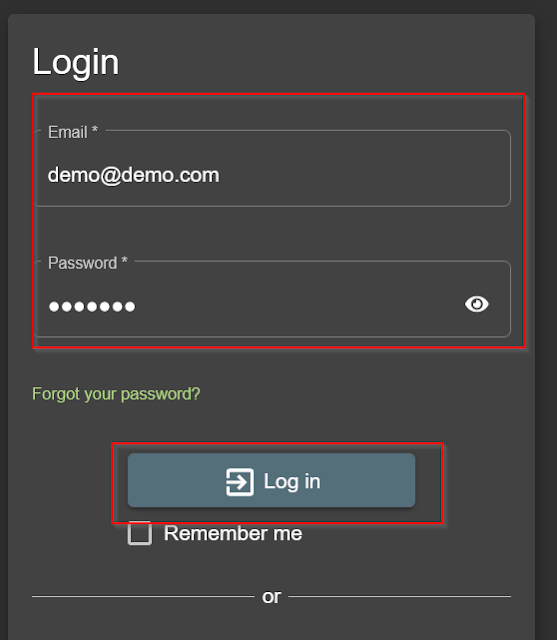
Enter username and password and click login.

Once the login is successful, close the browser.
Here our first step is complete.
Step 2: Create a new context of the root domain
Context is a feature in ZAP that allows us to add the domain in-scope based on regex and also allows us to configure authentication, Session management, Users, technologies, etc.
To create a new context of the root domain,
First, select the root domain from the site's section
.

Right-click on the selected site.
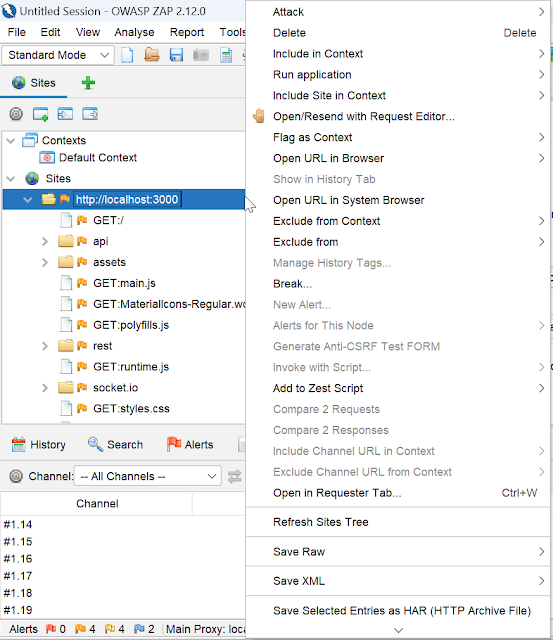
Now click include in context and then New Context.

It will open the session properties tab where we can change the context name (by default URL that we select) and click ok.

Now the context is created, and our second step is complete.
To configure the authentication, select the request from the site that performs the authentication
Right-click on the selected site.
Now click include in context and then New Context.
It will open the session properties tab where we can change the context name (by default URL that we select) and click ok.
Now the context is created, and our second step is complete.
Step 3: Configure Authentication
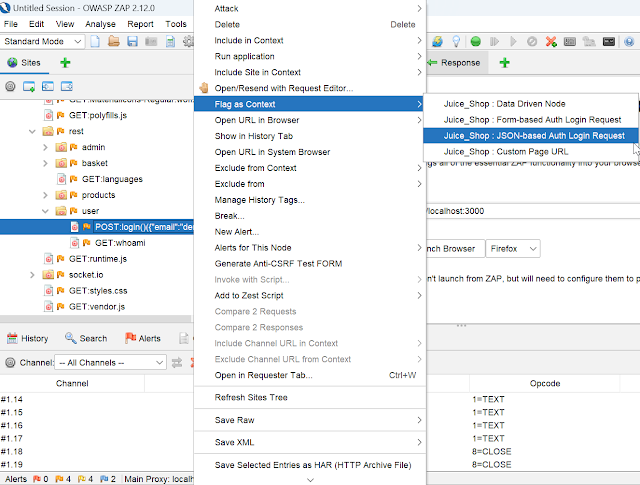
Once the context is created, configure the authentication in the context.To configure the authentication, select the request from the site that performs the authentication
.

Right-click on the selected request, click Flag as Context and then choose Juice_Shop: JSON-based Auth Login Request (Other Authentication methods can also be configured depending on the application).
Once you click the Session Properties window will open the authentication option where you have to perform some additional configuration like parameters and verification strategy. After configuration, click ok.

Here our third step is complete.
In this step, we have to add a user to perform the authentication.
To add the user double, click on context, click the Users option, click add button, and enter the user credentials.

After entering the credentials, click Add and then ok.
Now the user is also added, and step 4 is complete.
In this step, we will configure the Session Management in Context using script-based session management (other methods are also available based on application session management mechanism HTTP-based or Cookie based)
Session management is important to keep the user authenticated during the scan. In the Script-Based Session management method, we have to write a script based on a pre-defined template to manage the authentication session.
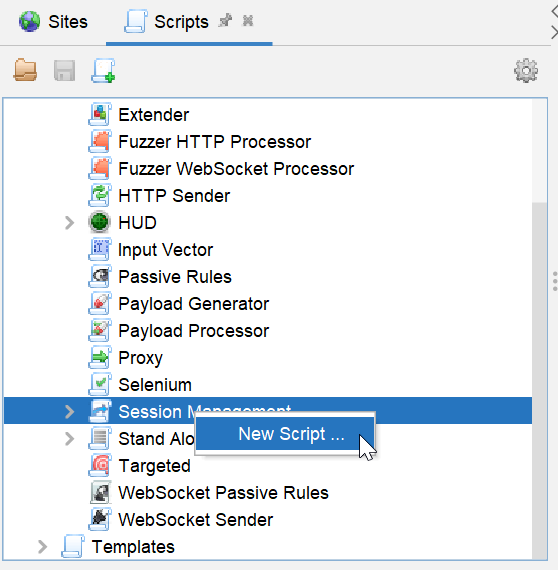
To create a Session Management script, click on the plus icon and then click the scripts button.

In the Scripts section right, click on the Session Management Script and click on the new script.
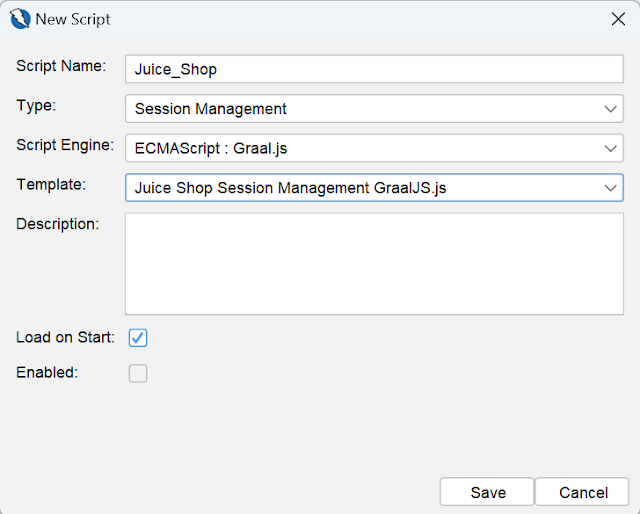
In the new script window, enter the script name, Type Session Management, Script Engine Graal.js, and Template, and then click save
Once the script is saved, double-click on context to open session properties and select the Session Management option.
In the Session Management option, select the session management option as Script-Based Session Management, choose the script that we have created from the script drop-down menu, and click load, then ok.

Here is step 5, complete
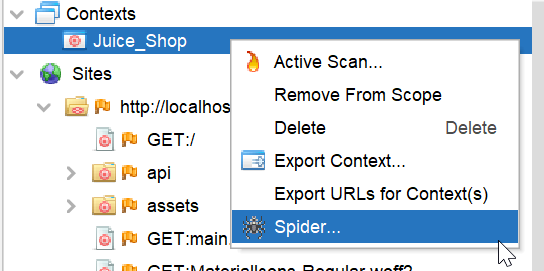
To run the spider, right-click on the context and click Spider.
It will open the spider window where we have to select the user we have added in step 4, then Click Start Scan.

Just so you know, here, step 6 is complete.
In this step, we will run the attack to start the scan to identify the vulnerabilities.
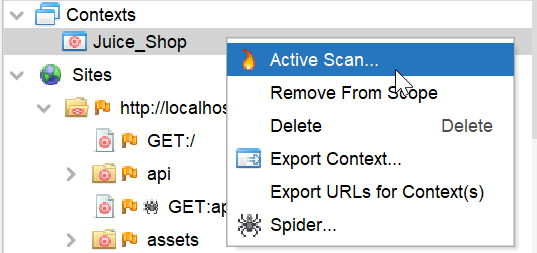
To run the Active Scan right, click on the context and click Active Scan.
It will open the Active Scan window in which we have to select the user we have added in step 4, then Click Start Scan.
Here, step 7 is completed.
Once the active scan is complete, we have to generate the report.
Click on generate report button to open the Generate Report Windows.

In the generate report window, enter the report title, report name, Report directory, description, context, and site, and then click on generate report button.

And here, our last step is completed, and the report is generated.
Right-click on the selected request, click Flag as Context and then choose Juice_Shop: JSON-based Auth Login Request (Other Authentication methods can also be configured depending on the application).
Once you click the Session Properties window will open the authentication option where you have to perform some additional configuration like parameters and verification strategy. After configuration, click ok.
Here our third step is complete.
Step 4: Add the user.
In this step, we have to add a user to perform the authentication.
To add the user double, click on context, click the Users option, click add button, and enter the user credentials.
After entering the credentials, click Add and then ok.
Now the user is also added, and step 4 is complete.
Step 5: Configure Session management
In this step, we will configure the Session Management in Context using script-based session management (other methods are also available based on application session management mechanism HTTP-based or Cookie based)
Session management is important to keep the user authenticated during the scan. In the Script-Based Session management method, we have to write a script based on a pre-defined template to manage the authentication session.
To create a Session Management script, click on the plus icon and then click the scripts button.
In the Scripts section right, click on the Session Management Script and click on the new script.
In the new script window, enter the script name, Type Session Management, Script Engine Graal.js, and Template, and then click save
Once the script is saved, double-click on context to open session properties and select the Session Management option.
In the Session Management option, select the session management option as Script-Based Session Management, choose the script that we have created from the script drop-down menu, and click load, then ok.
Here is step 5, complete
Step 6: Spider the Website.
To run the spider, right-click on the context and click Spider.
It will open the spider window where we have to select the user we have added in step 4, then Click Start Scan.
Just so you know, here, step 6 is complete.
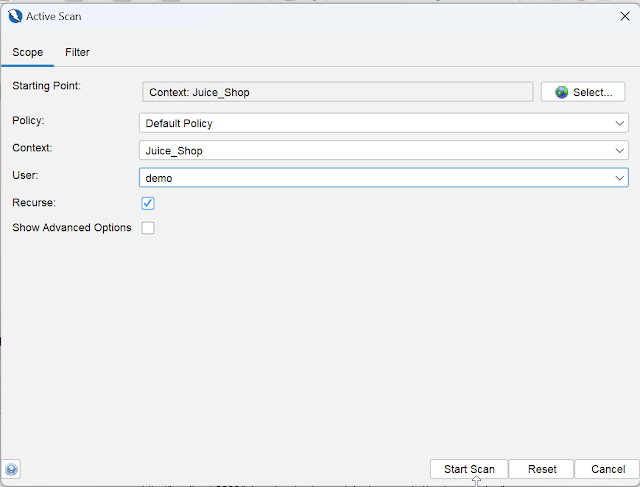
Step 7: Run Active Scan.
In this step, we will run the attack to start the scan to identify the vulnerabilities.
To run the Active Scan right, click on the context and click Active Scan.
It will open the Active Scan window in which we have to select the user we have added in step 4, then Click Start Scan.
Here, step 7 is completed.
Step 8: Generate a report.
Once the active scan is complete, we have to generate the report.
Click on generate report button to open the Generate Report Windows.
In the generate report window, enter the report title, report name, Report directory, description, context, and site, and then click on generate report button.
And here, our last step is completed, and the report is generated.
Tags:
DAST